Foraged and Found - DIY Wreath

Kerry Jayne Photography
Continuing on with the these of a DIY Christmas this post will show you how to create a beautiful wreath using only a few bought items and plenty of foraged foliage. Even the simplest of designs with the addition of colourful ribbon and dried fruit can bring some festive cheer to any front door!
Follow the steps below to make your own wreath:

YOU WILL NEED:
Wreath Base - Grapevine bases are the easiest if you wish to make yourself.
Garden Snips
Gardening Wire on a roll
Florists wire lengths
Selection of foliage cut into sprigs
Dried Orange slices.
Step 1.
Begin by prepping your fruit bunches taking one or two orange slices and a length of the florists wire. Push the wire through the soft part of the orange slice/s and then twist it together. You should now have the oranges secured on a length of wire.

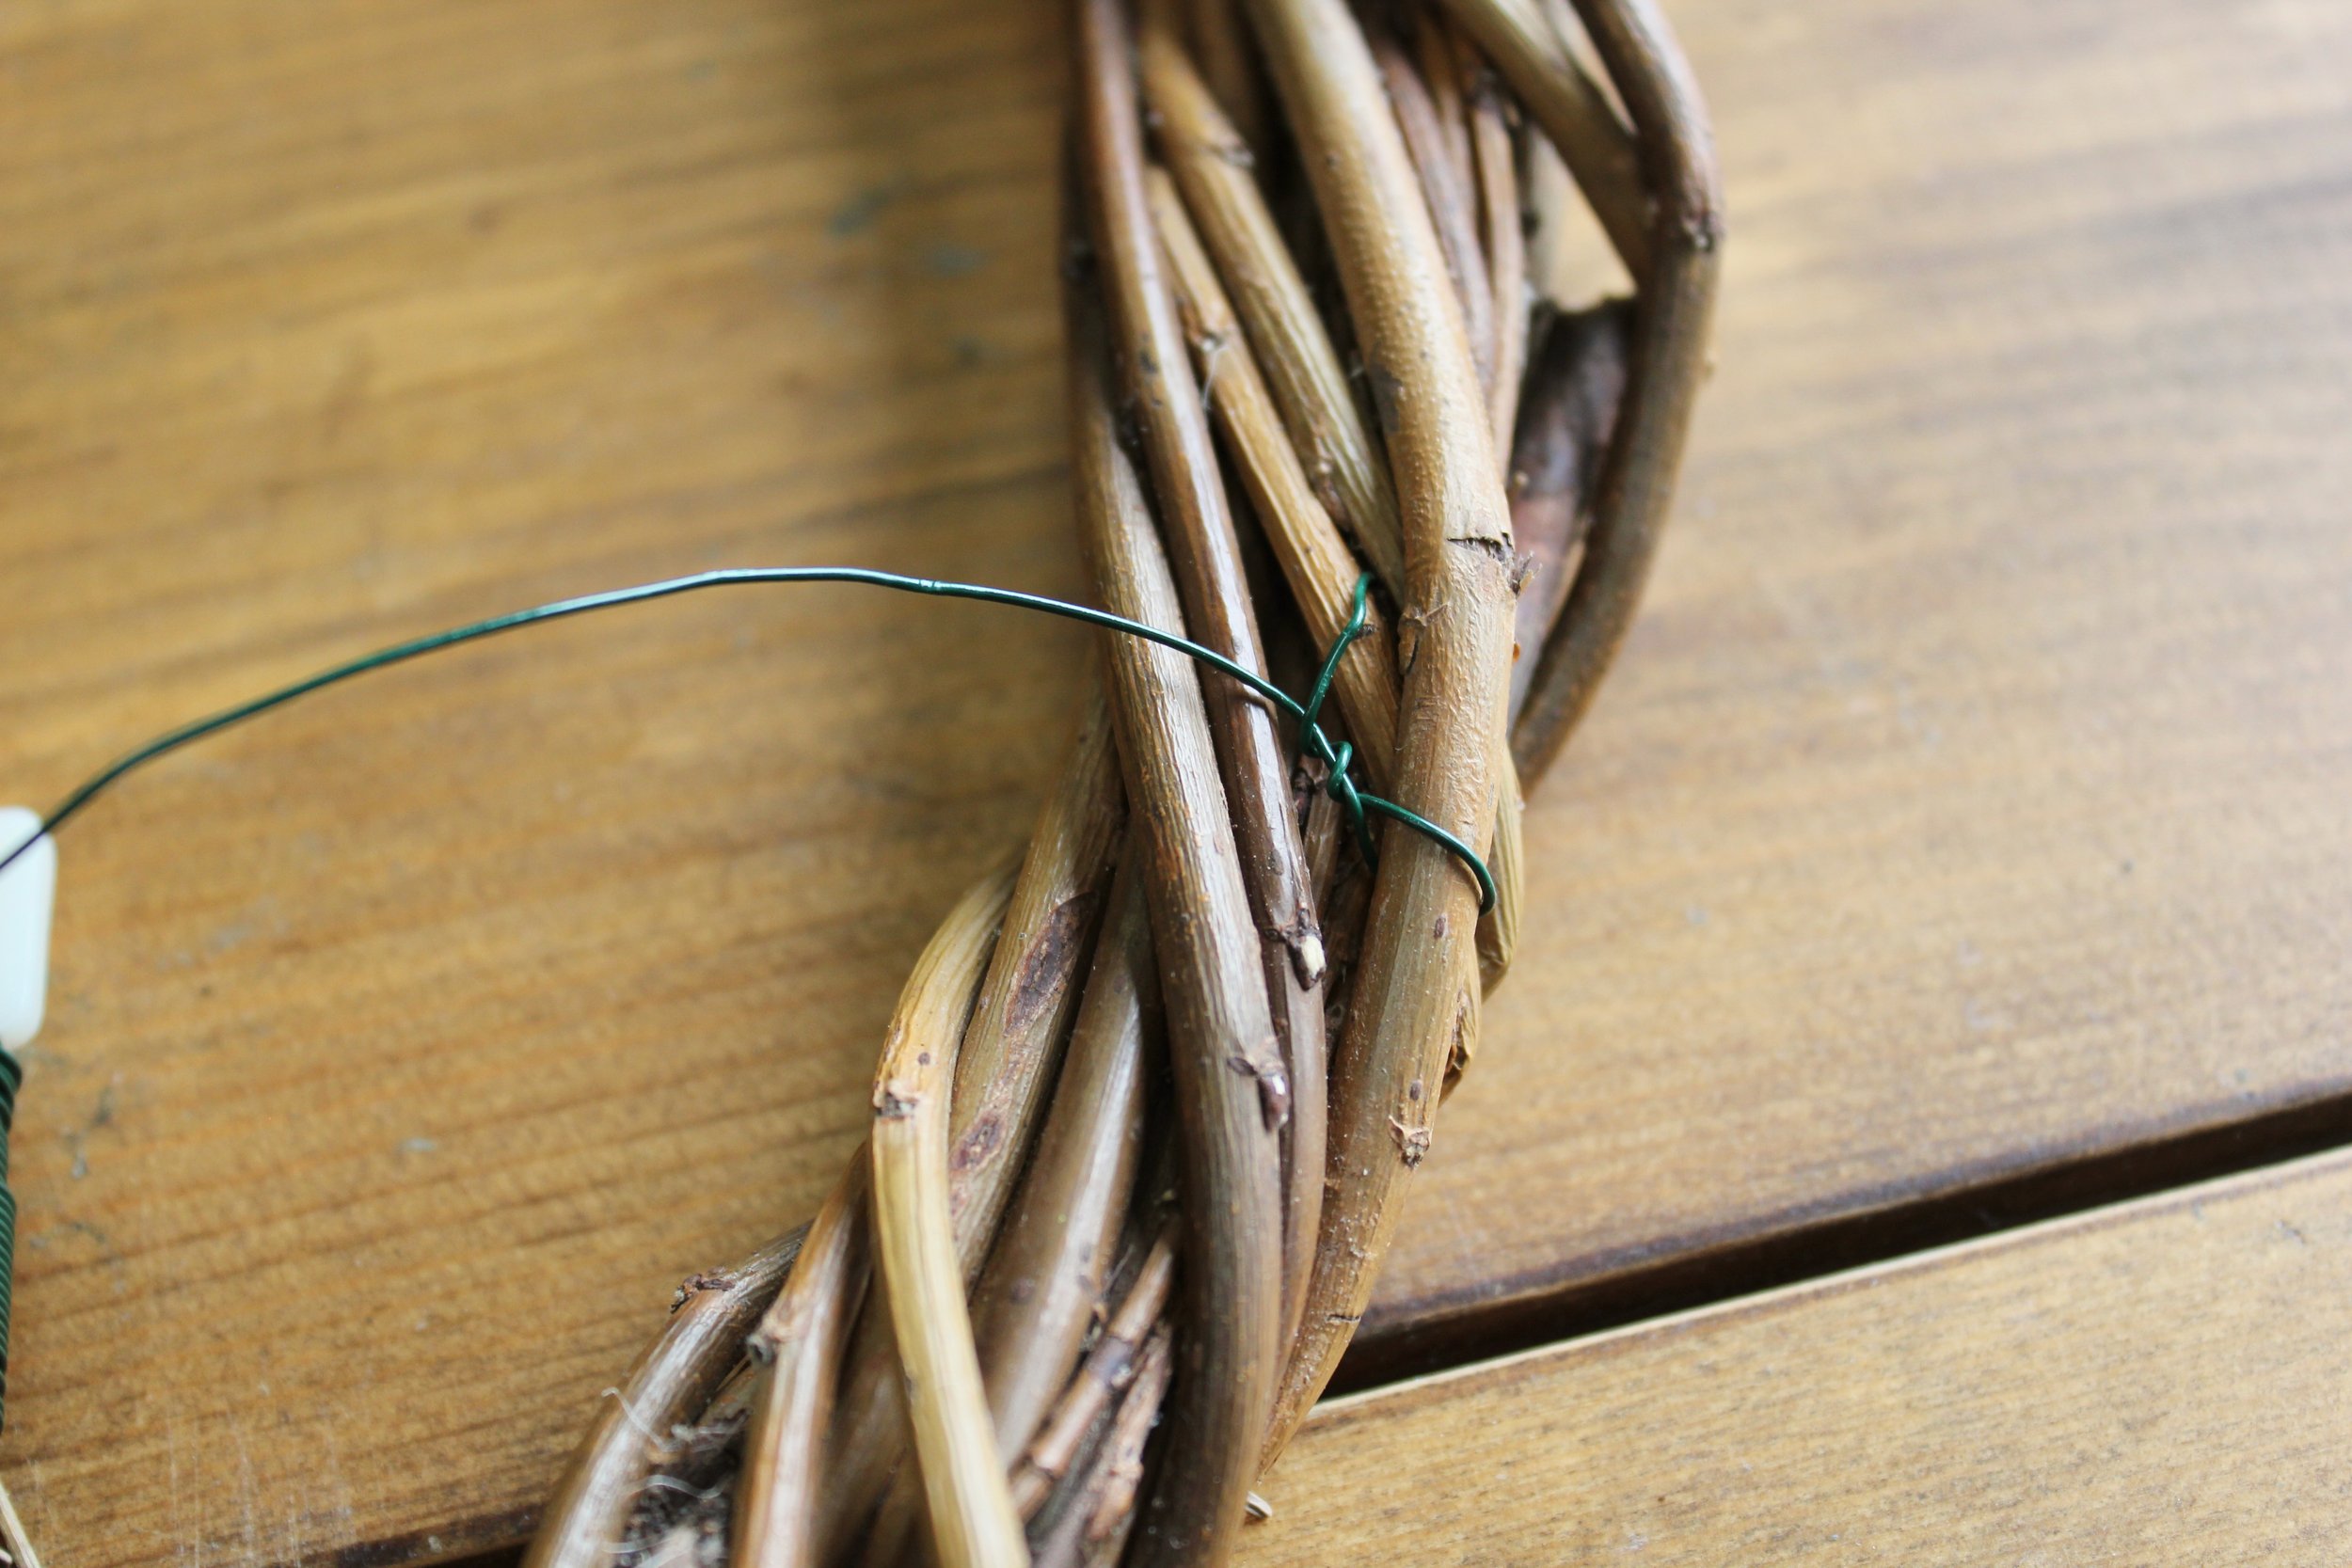
Step 2.
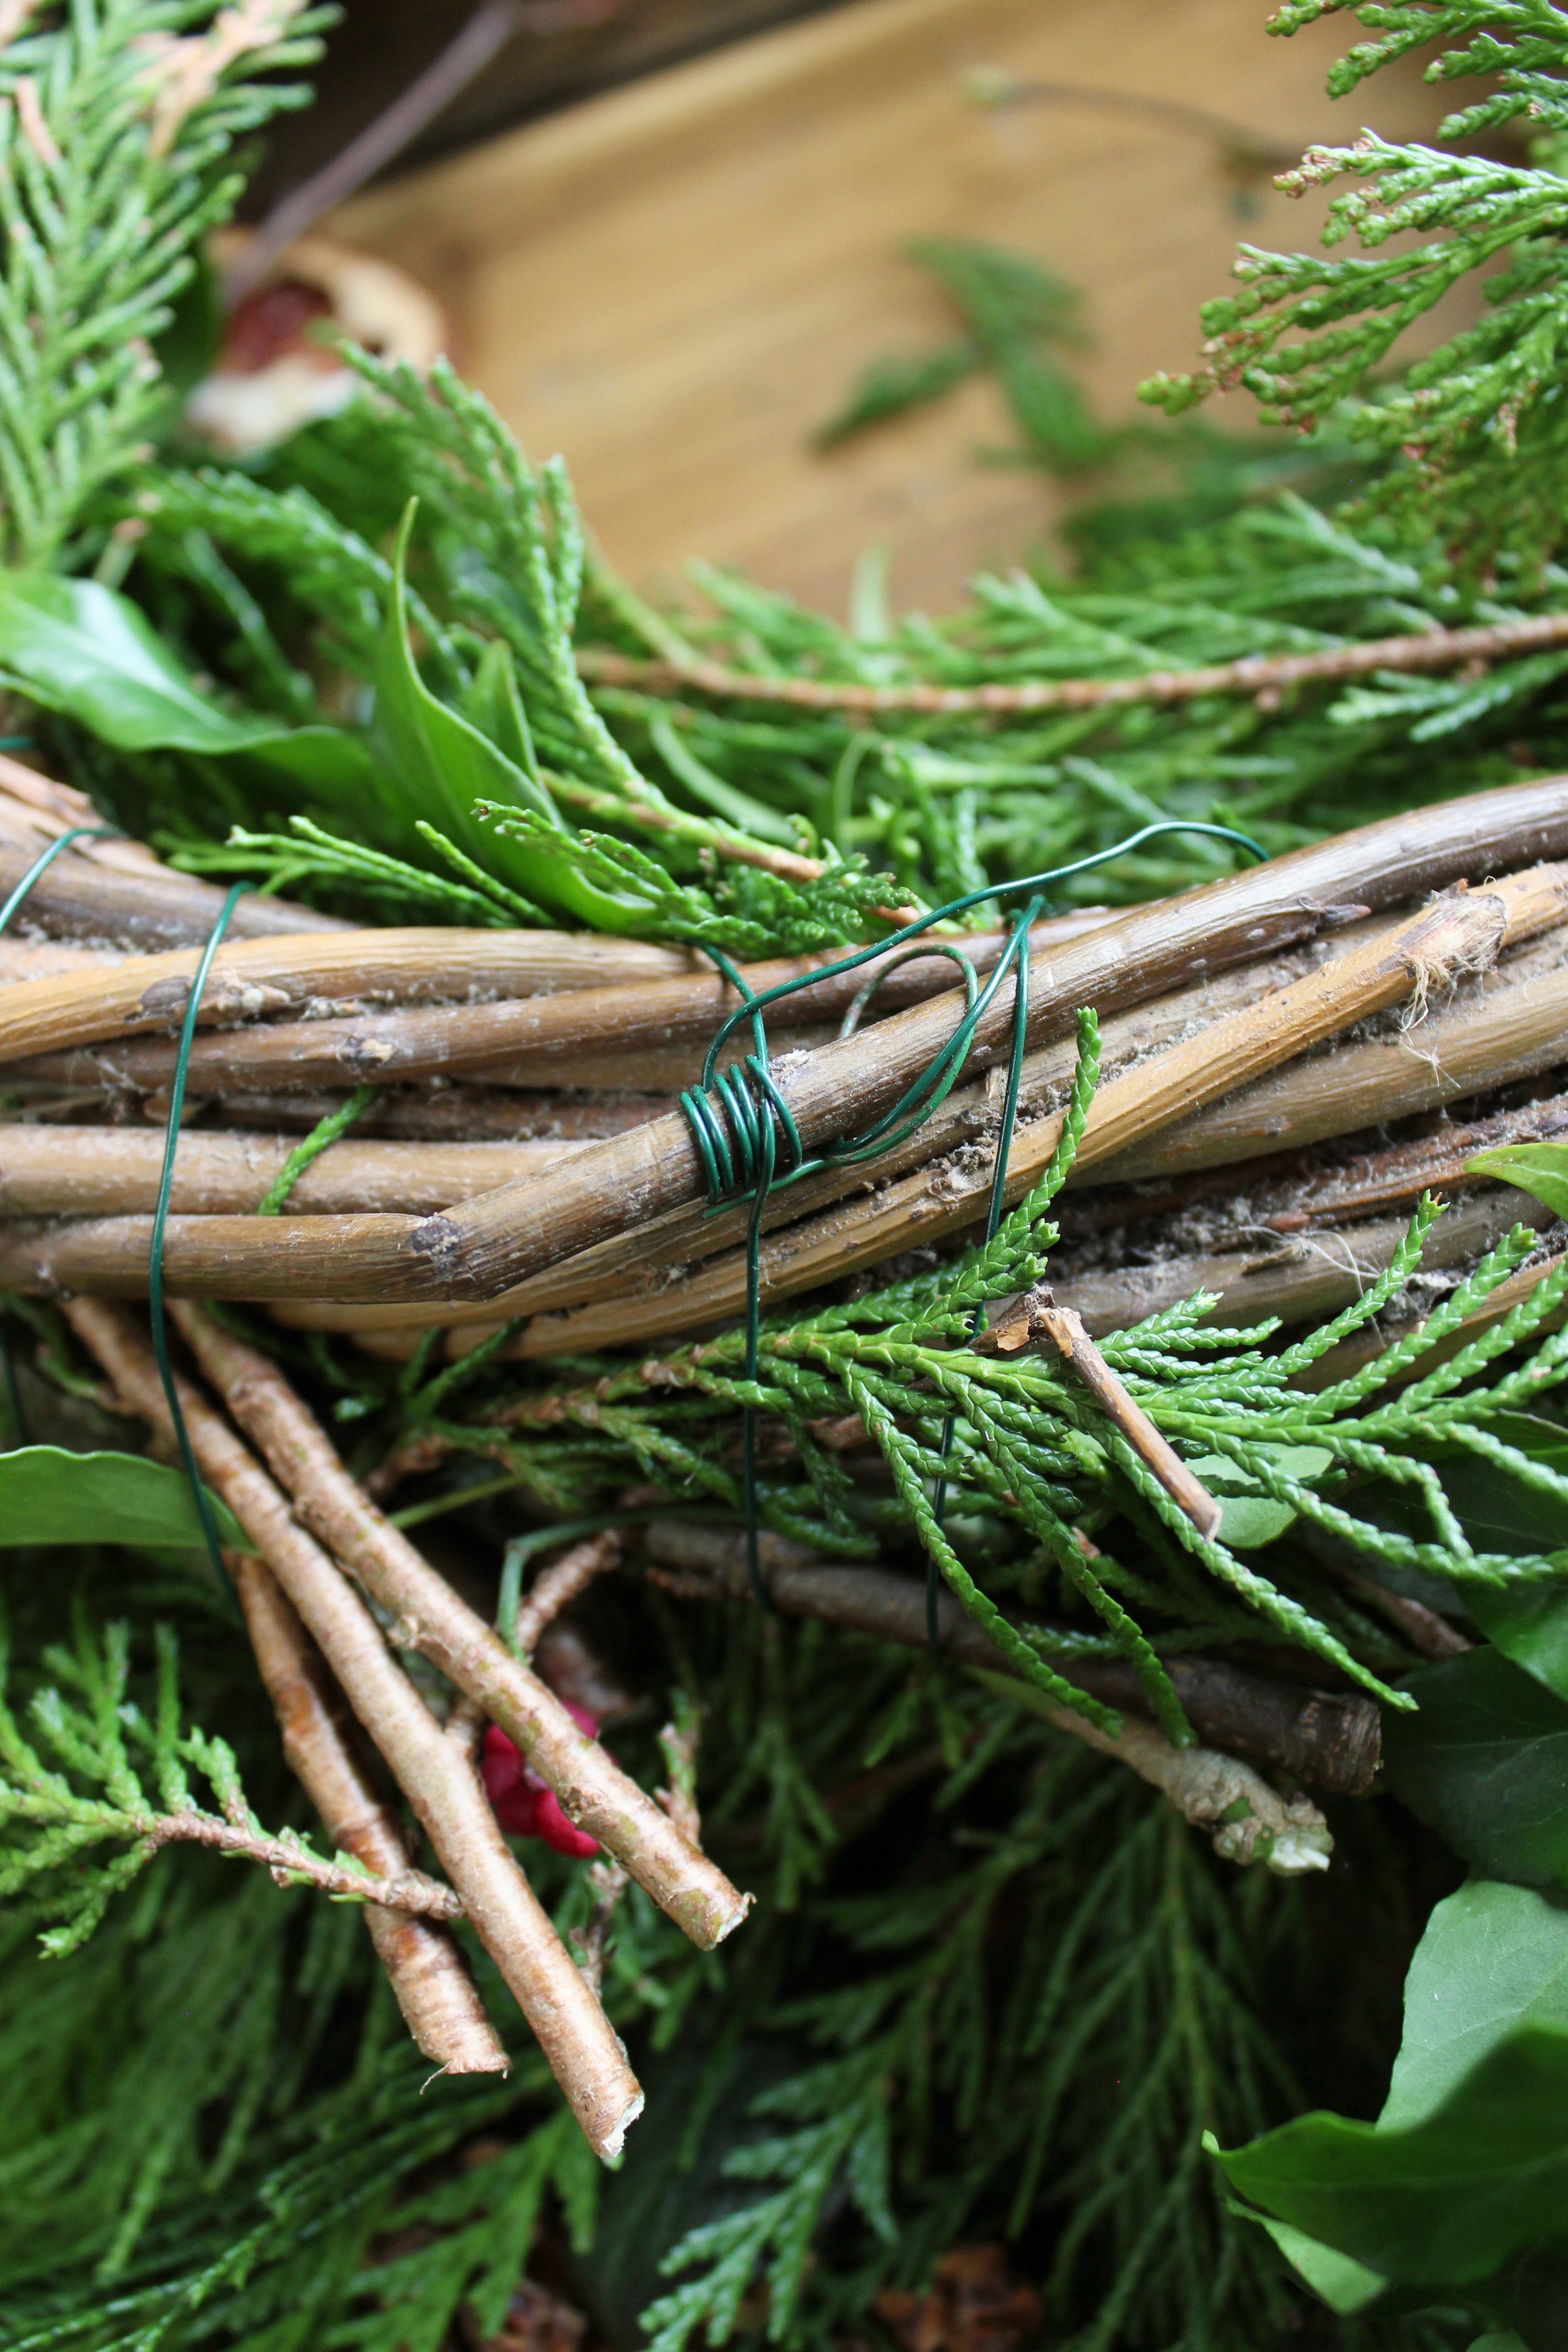
Next, taking the roll of gardening wire secure the end to the back of your wreath base.
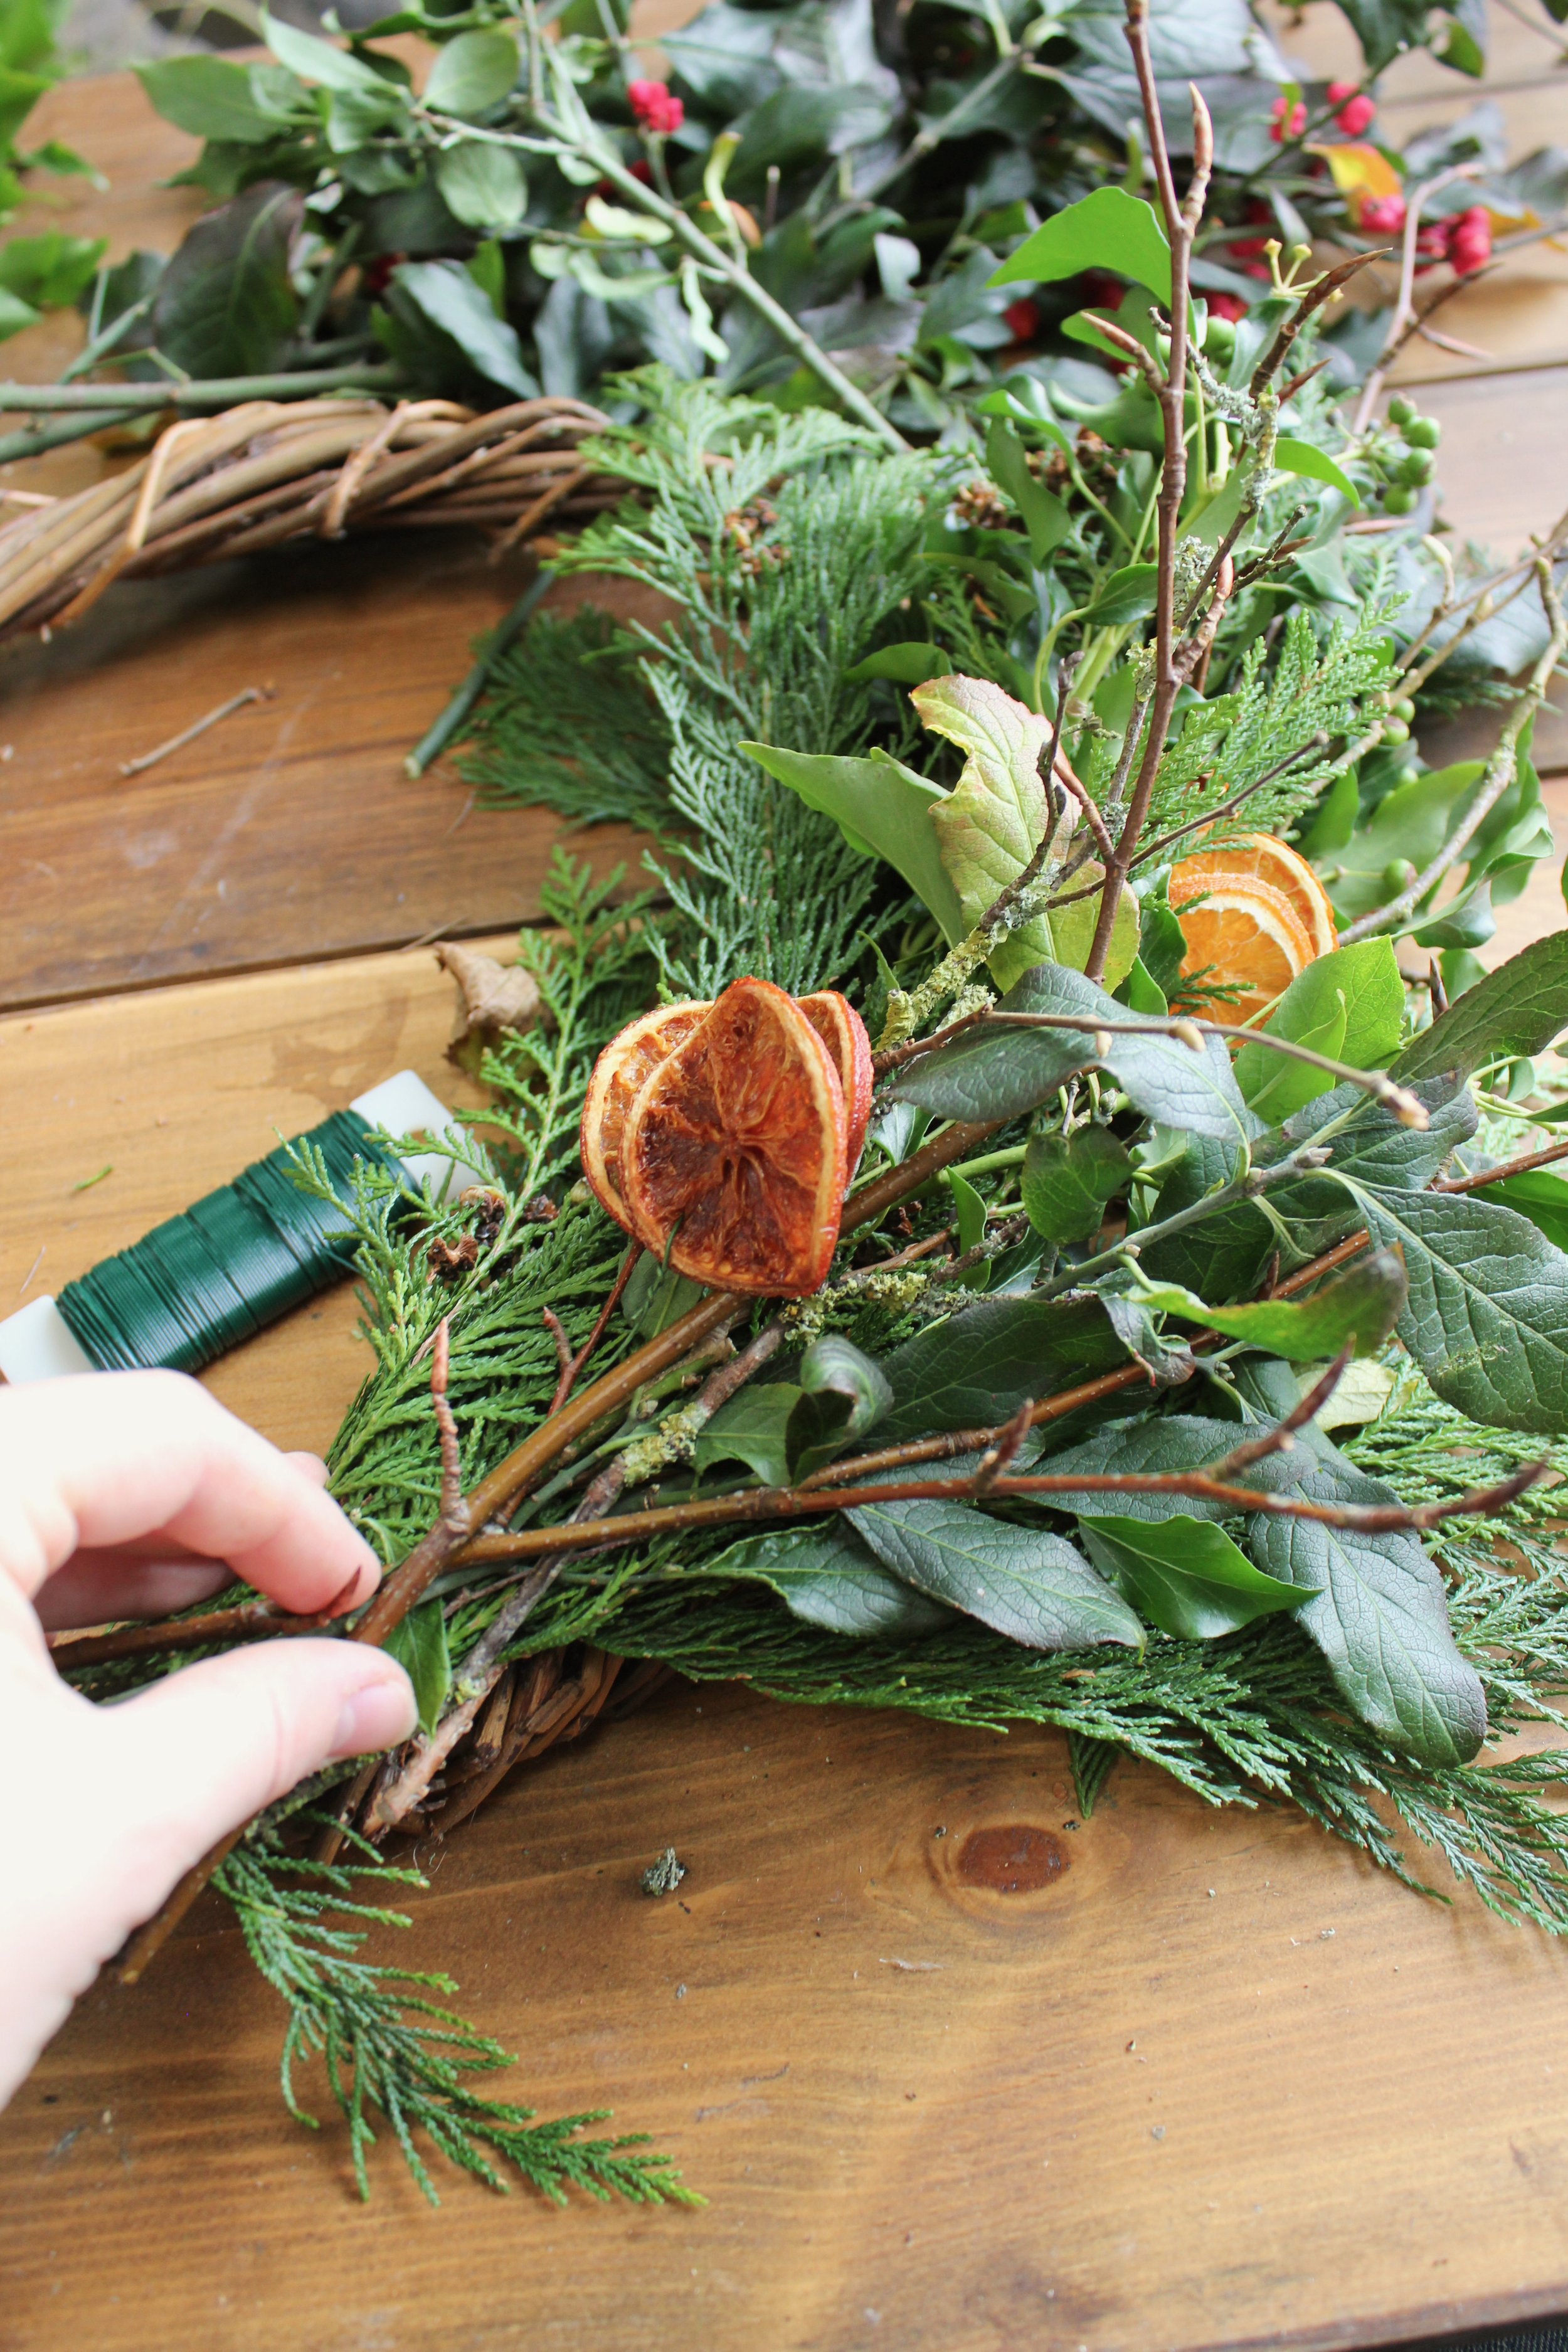
Step 3.
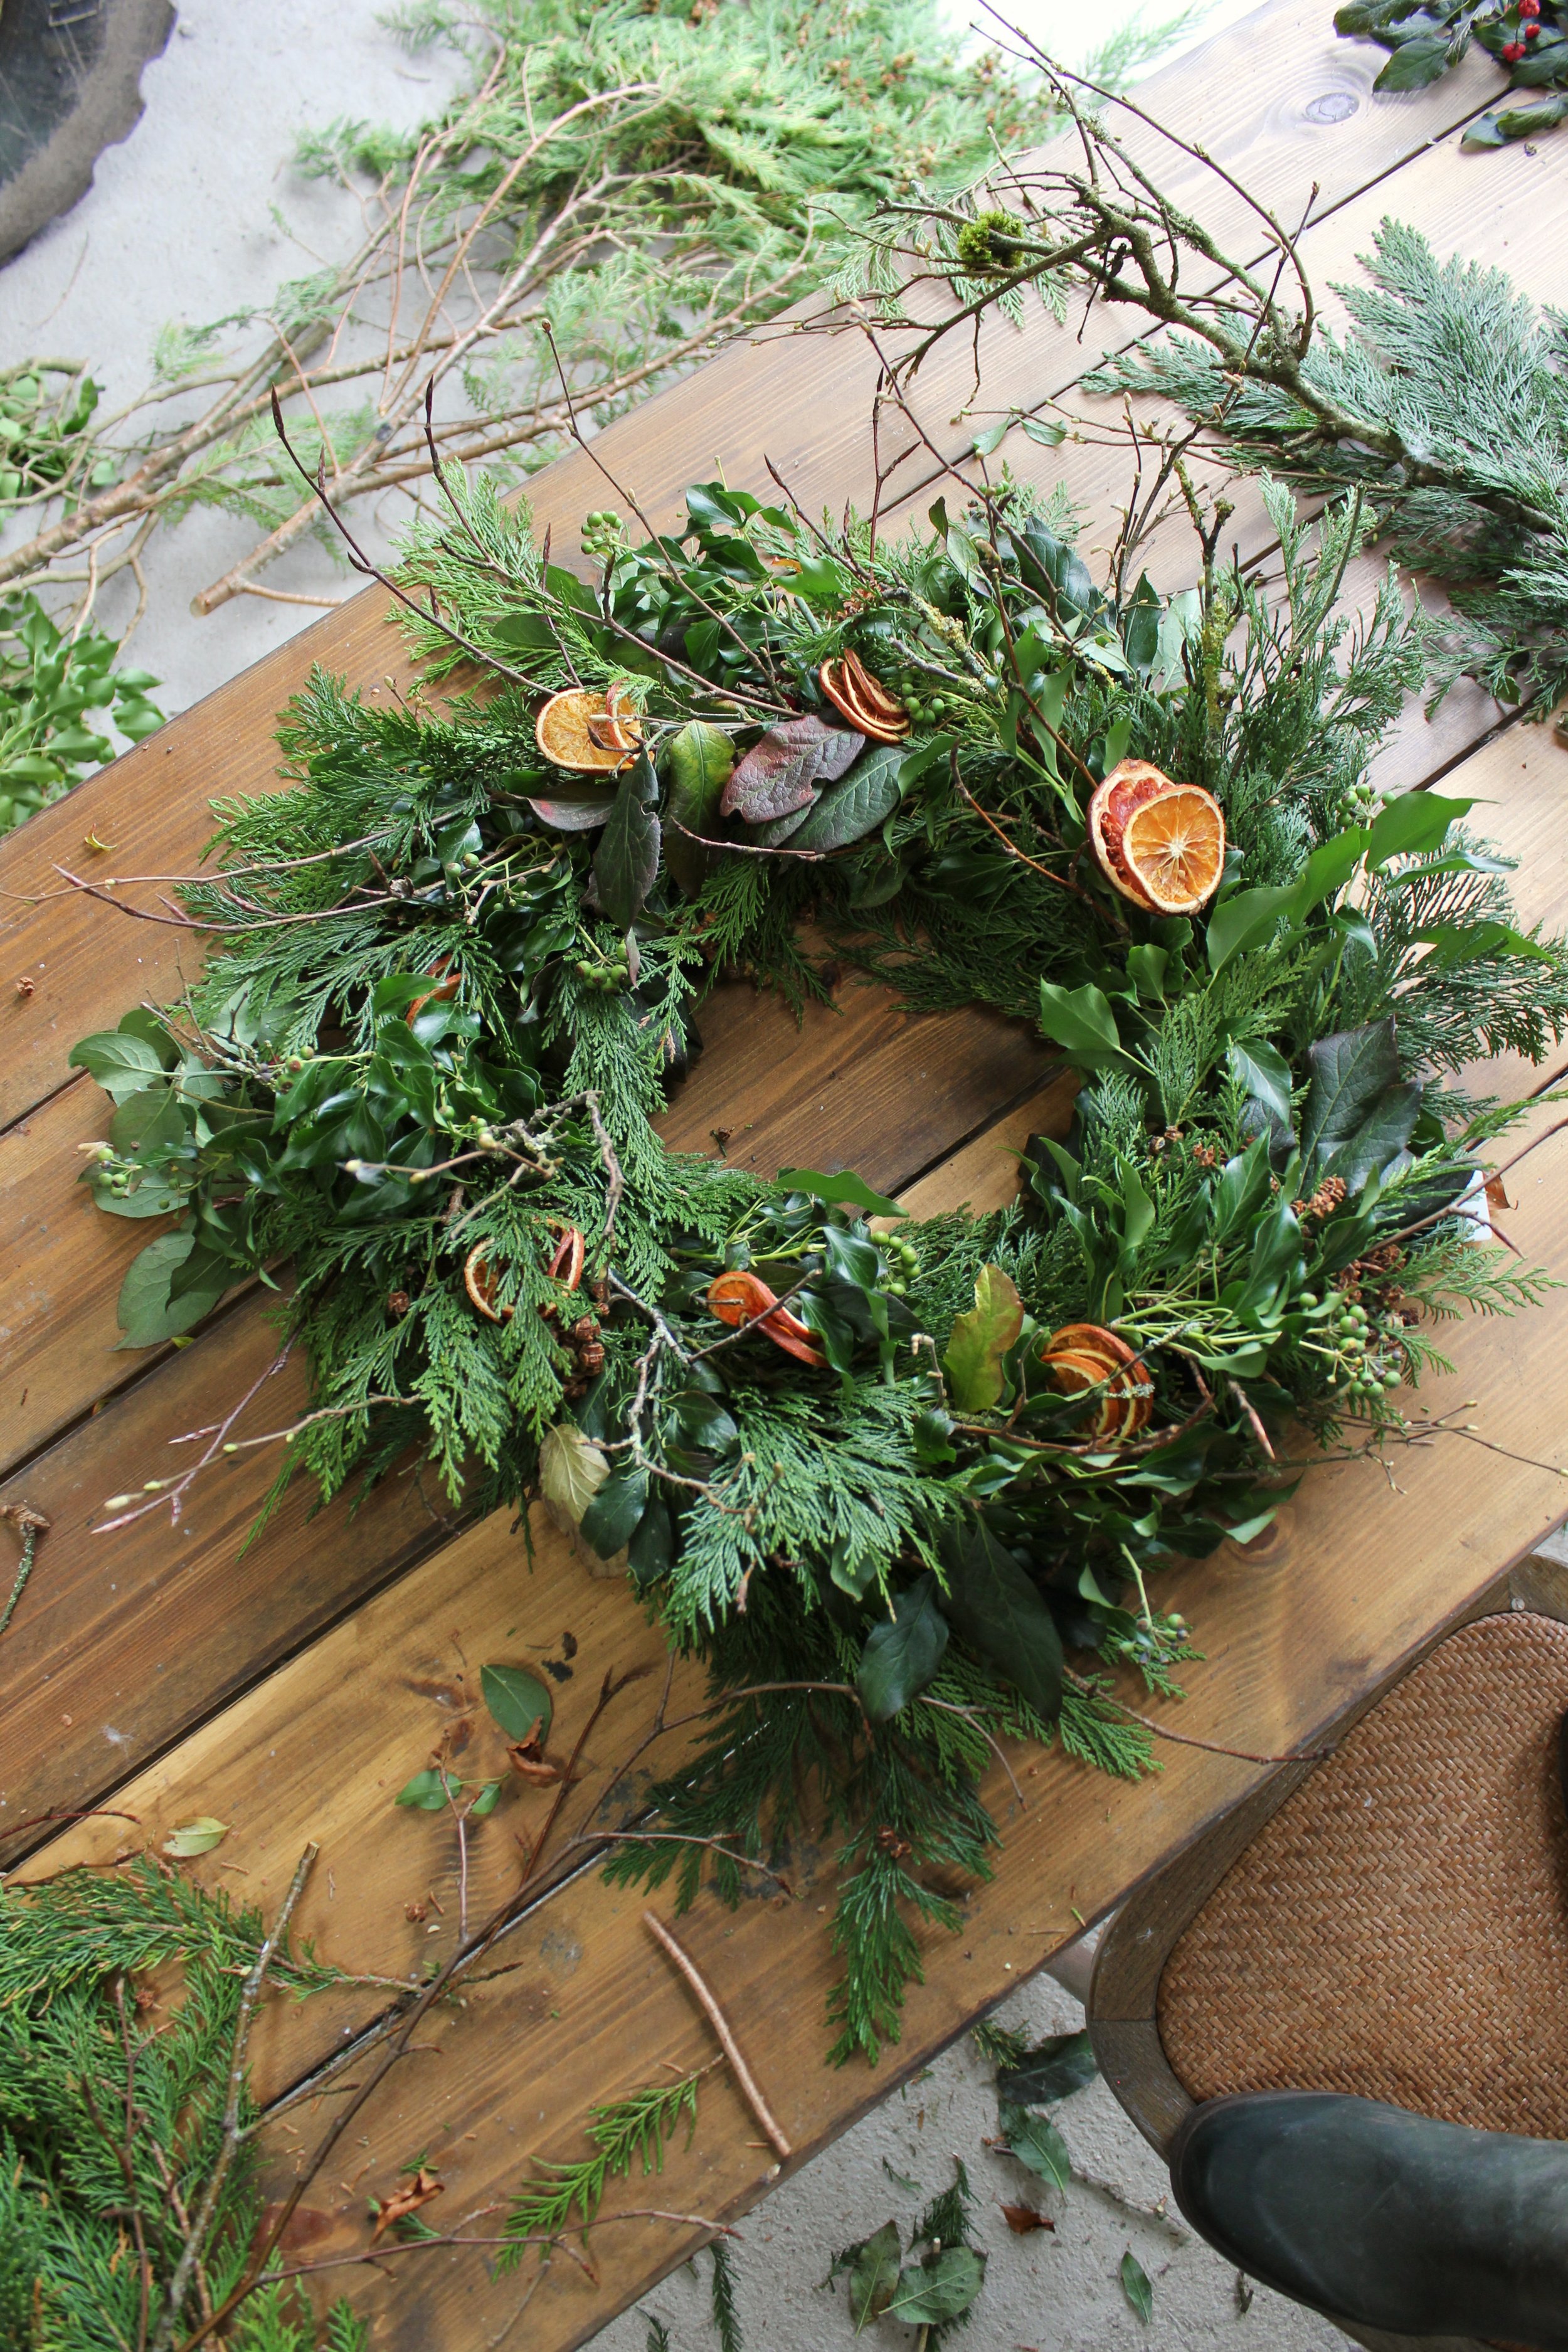
To begin creating the wreath make a little bundle of foliage and dried fruit. This wants to be quite dense so that you can’t see through and remember to layer the fruit on the top so that it doesn’t get lost amongst the greenery. It can help to come up with a ‘recipe’ of the combination of foliage sprigs, this way you will keep them consistent the whole way round the wreath.

Step 4.
Place your bundle of foliage on the front of the wreath where you secured the wire. Make sure the wire will wrap round the stems not the foliage section. The way the bottom of the stems are pointing is the way you will be working around the base, so if they are pointing left you will work clockwise around the wreath and if the are pointing right you will work anti-clockwise.
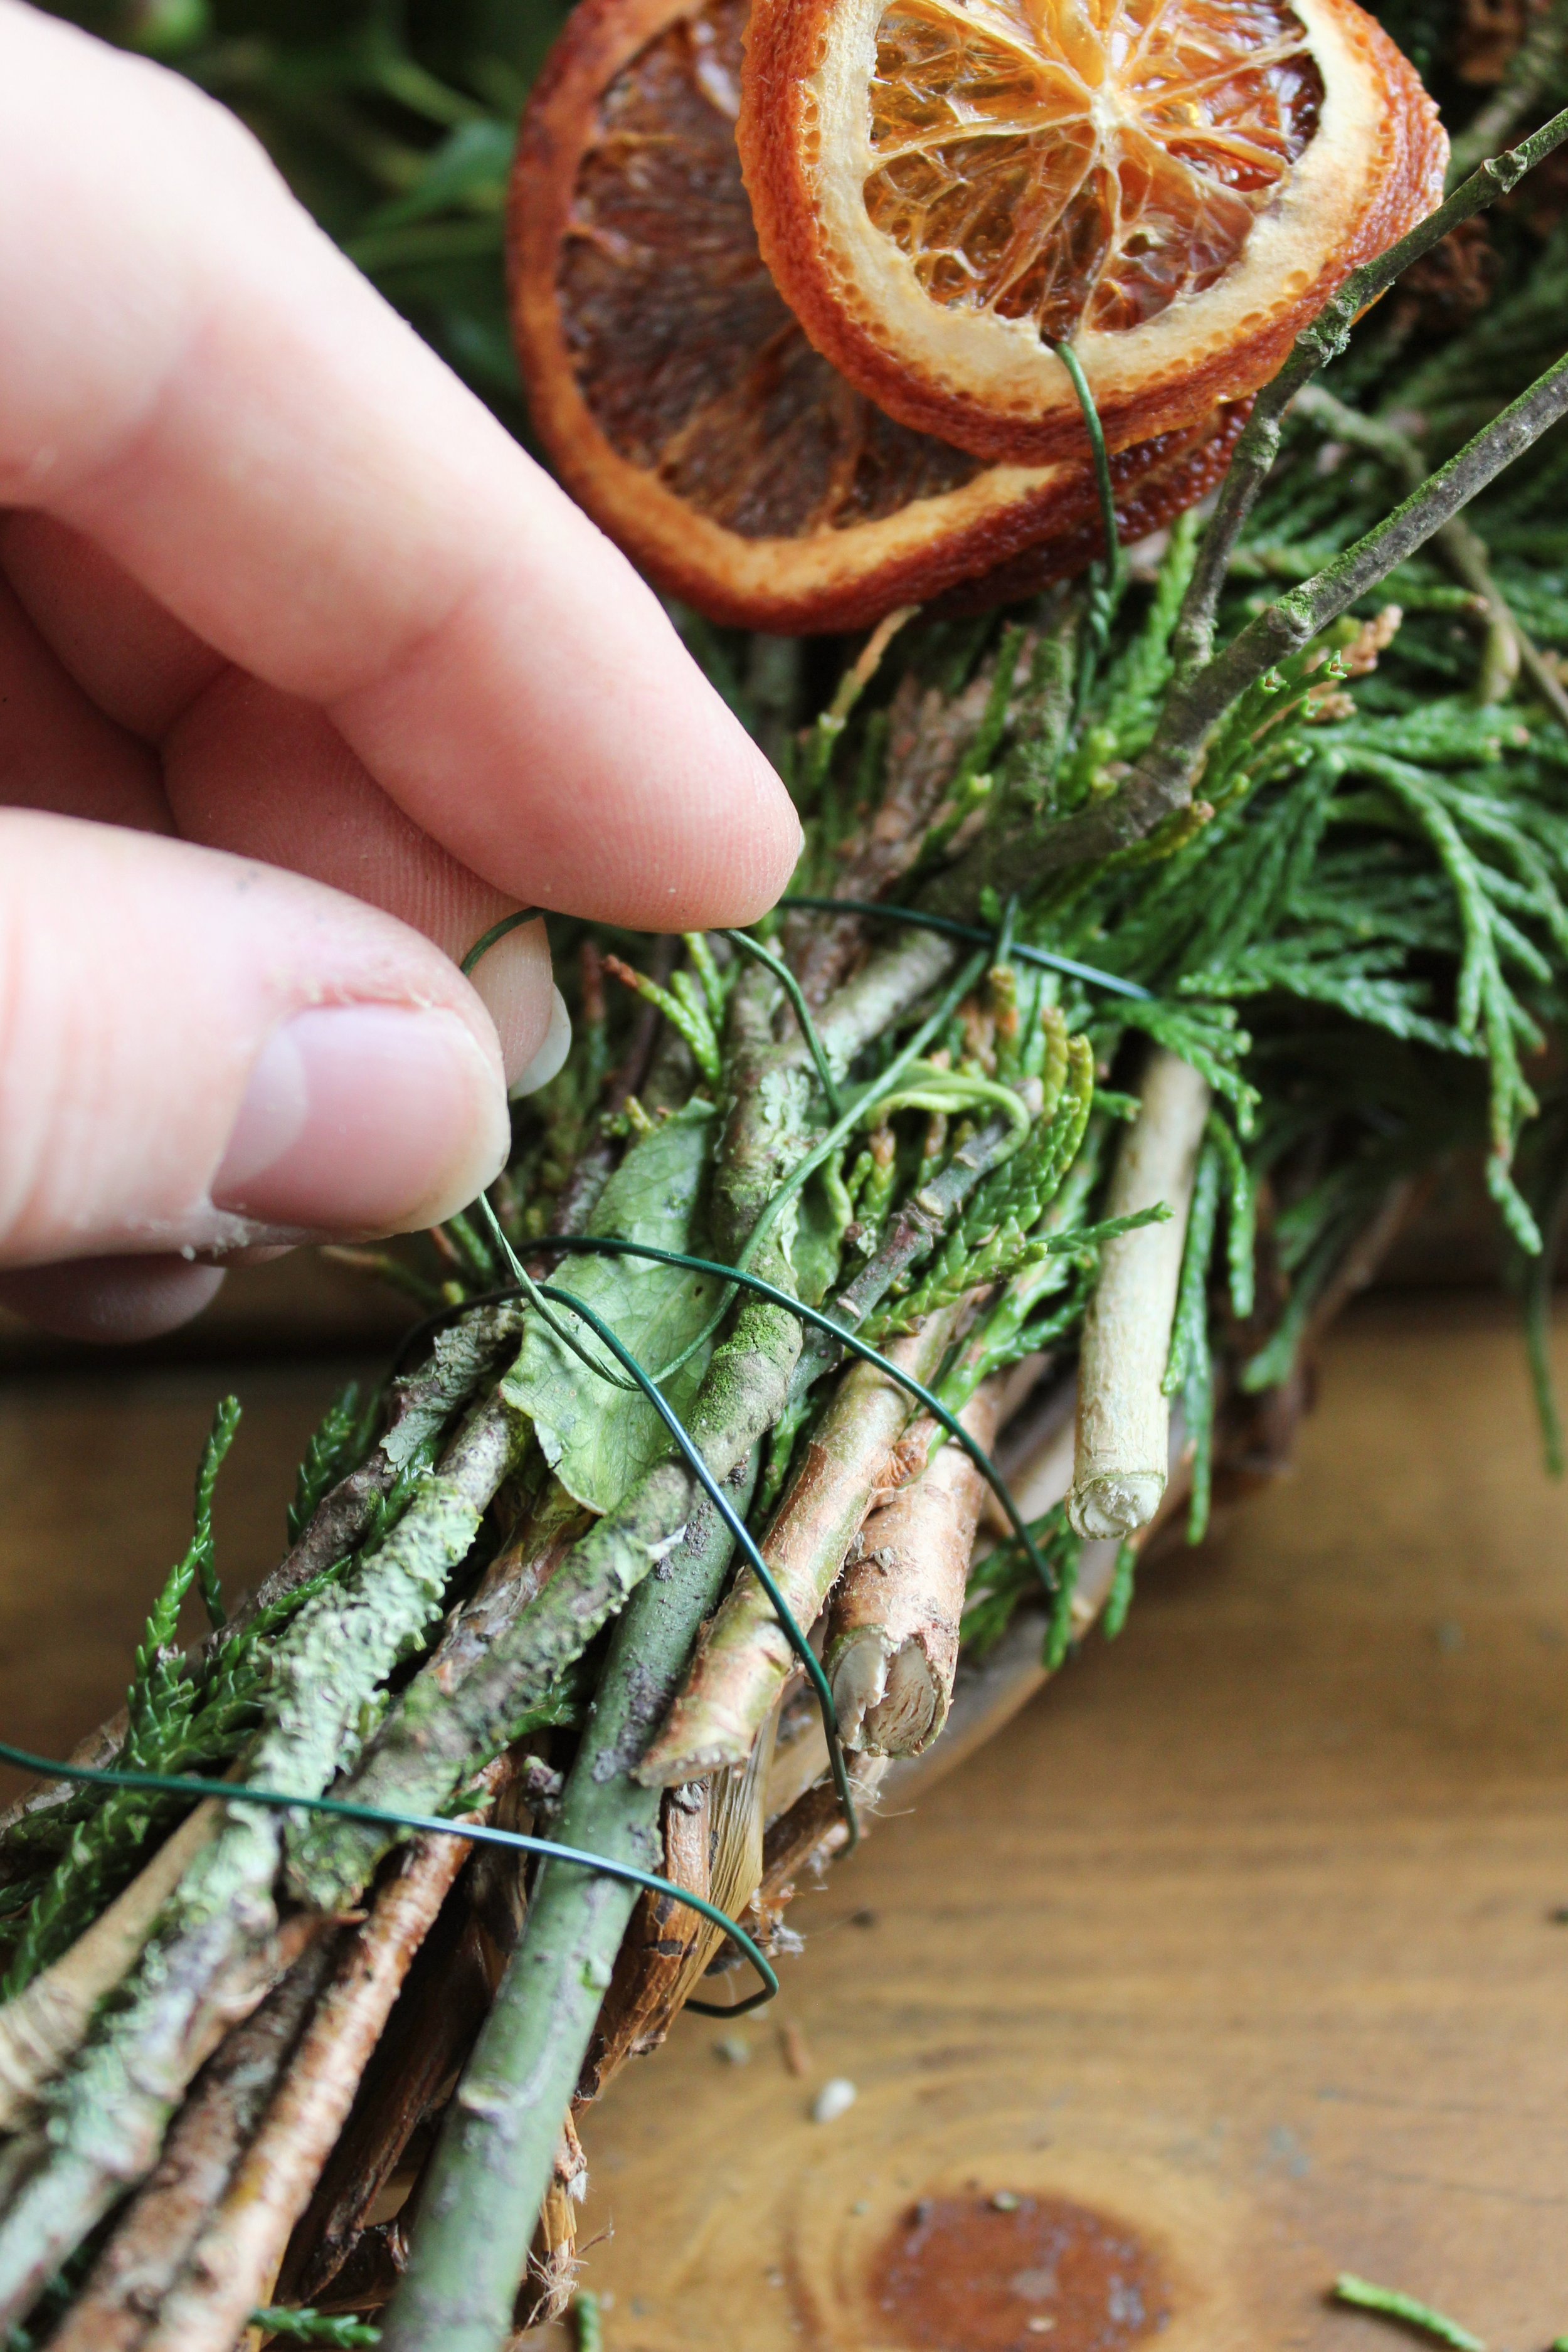
Step 5.
Now, wrap the wire around the stems of your bundle working down to the base of them until the bundle is completely secure.

Step 6.
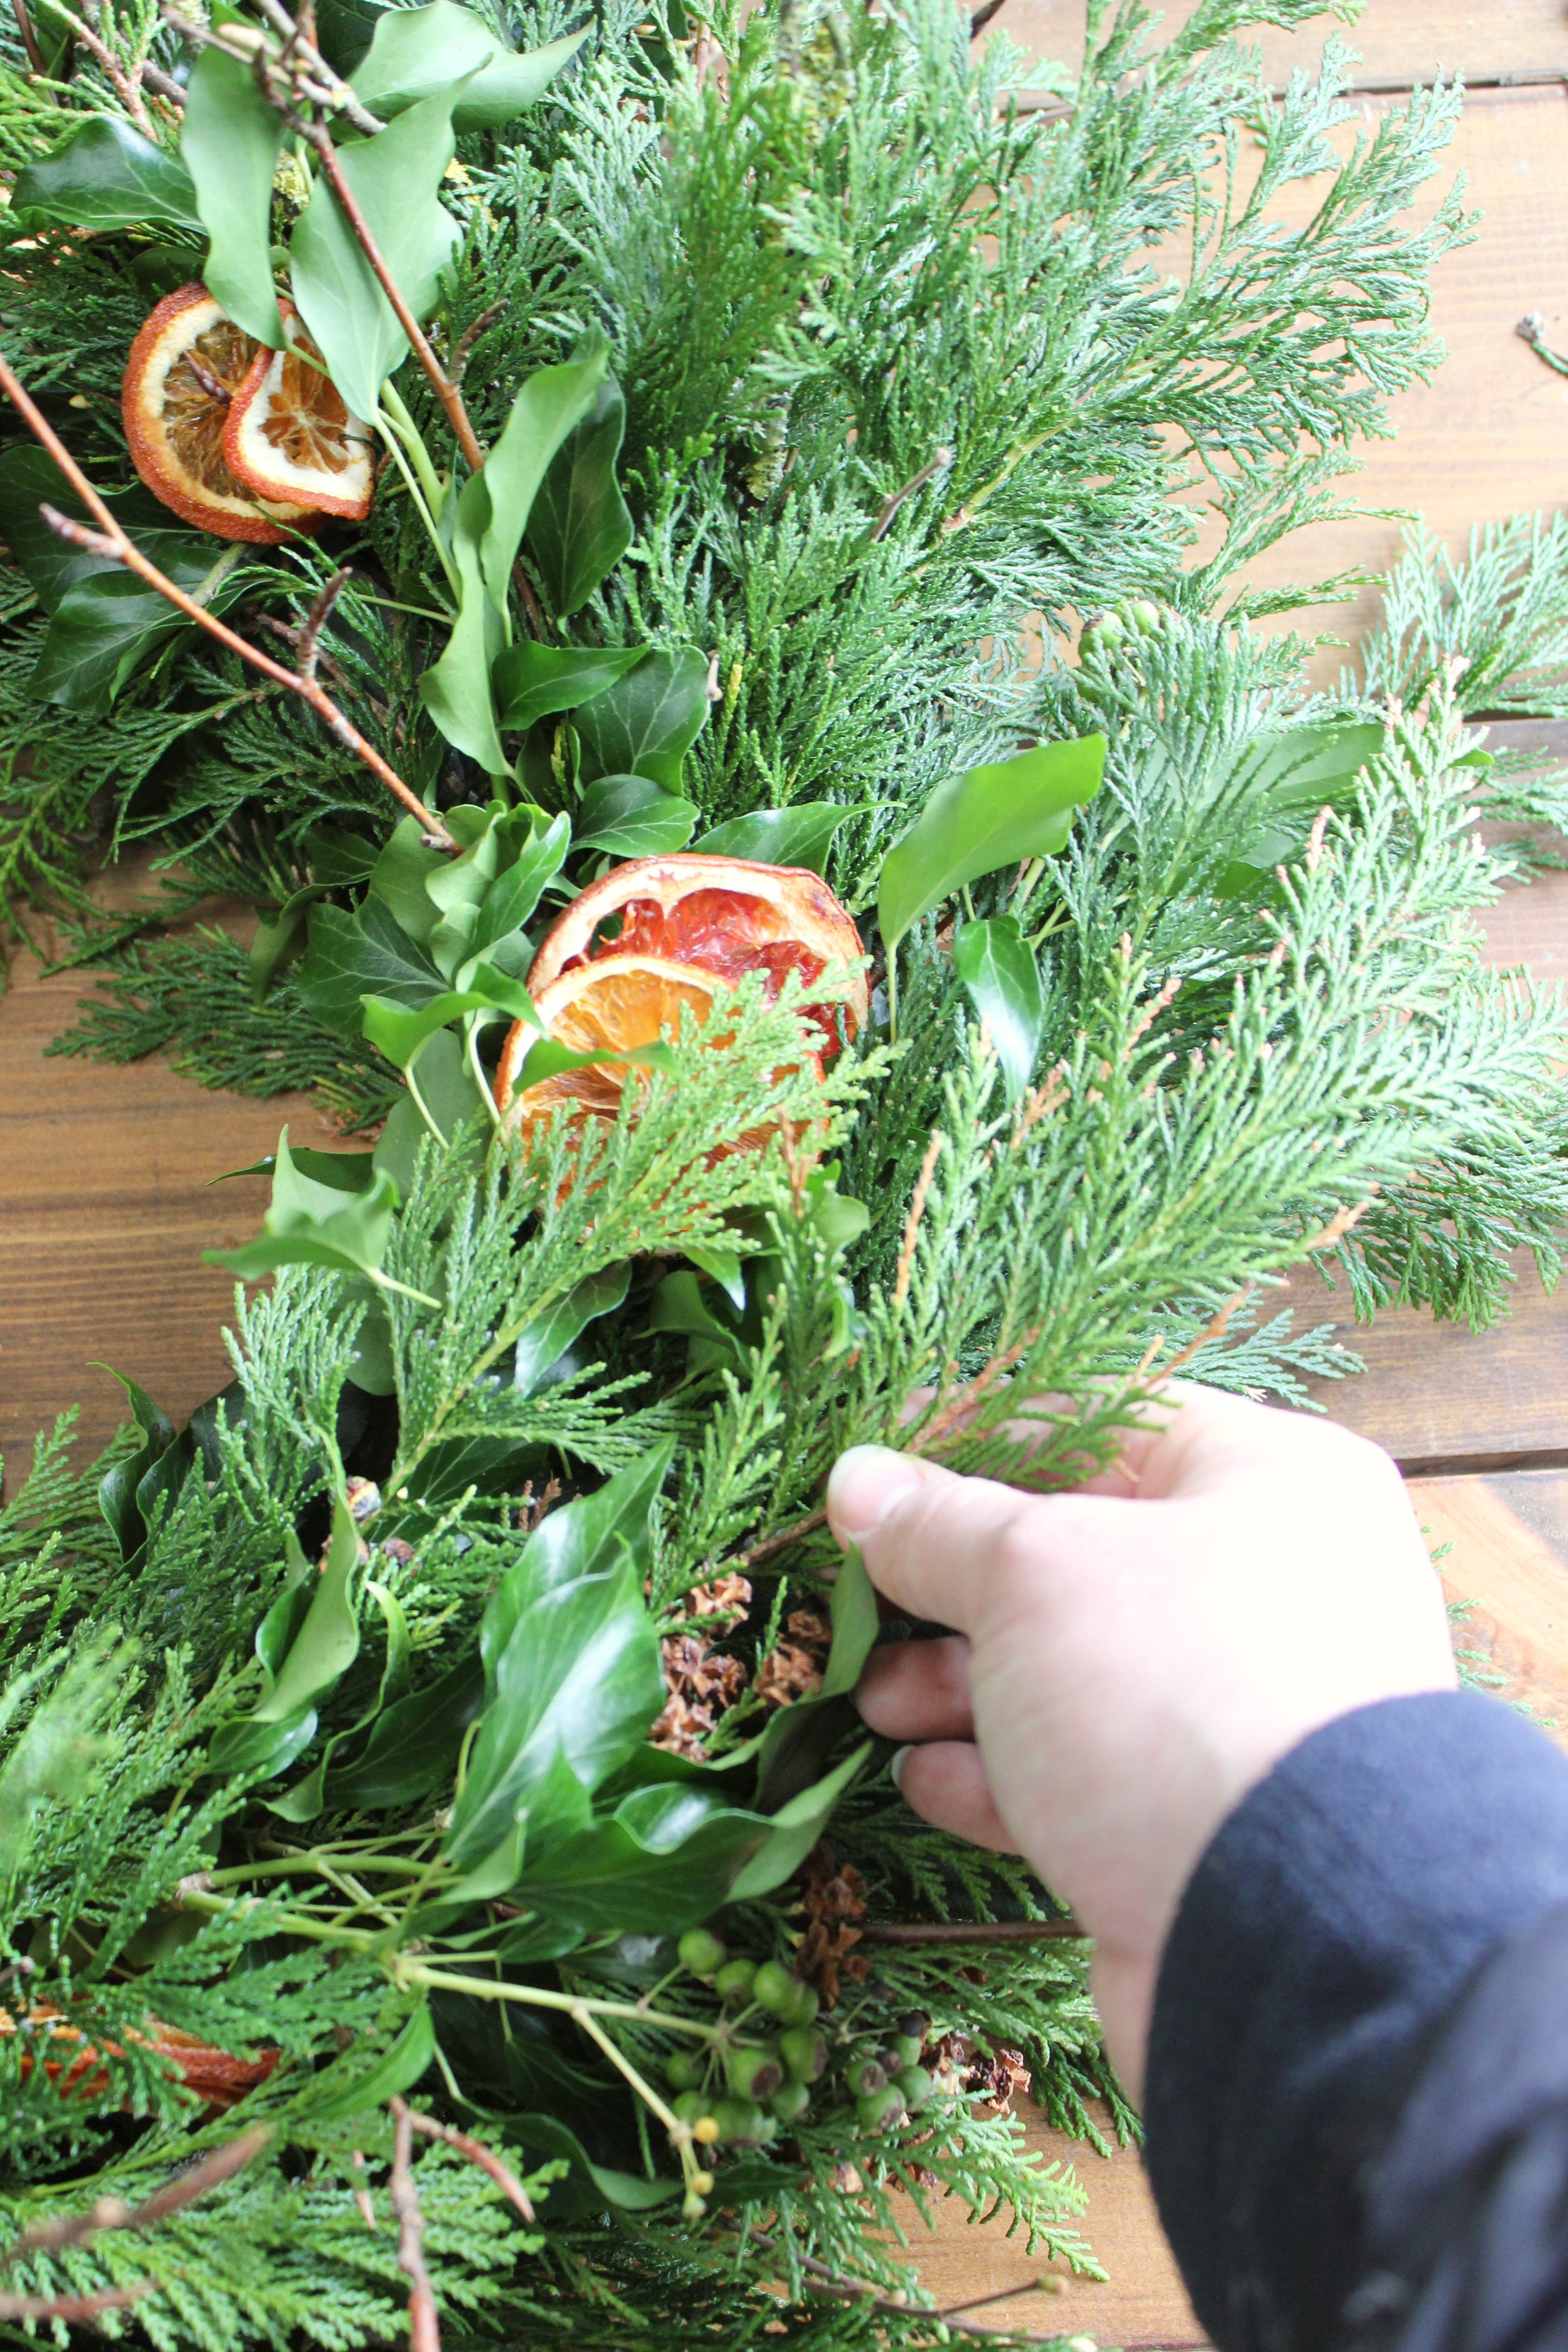
To make sure the dried oranges are held in place wind the wire length attached to them back into the wreath. This way they won’t slide out easily.
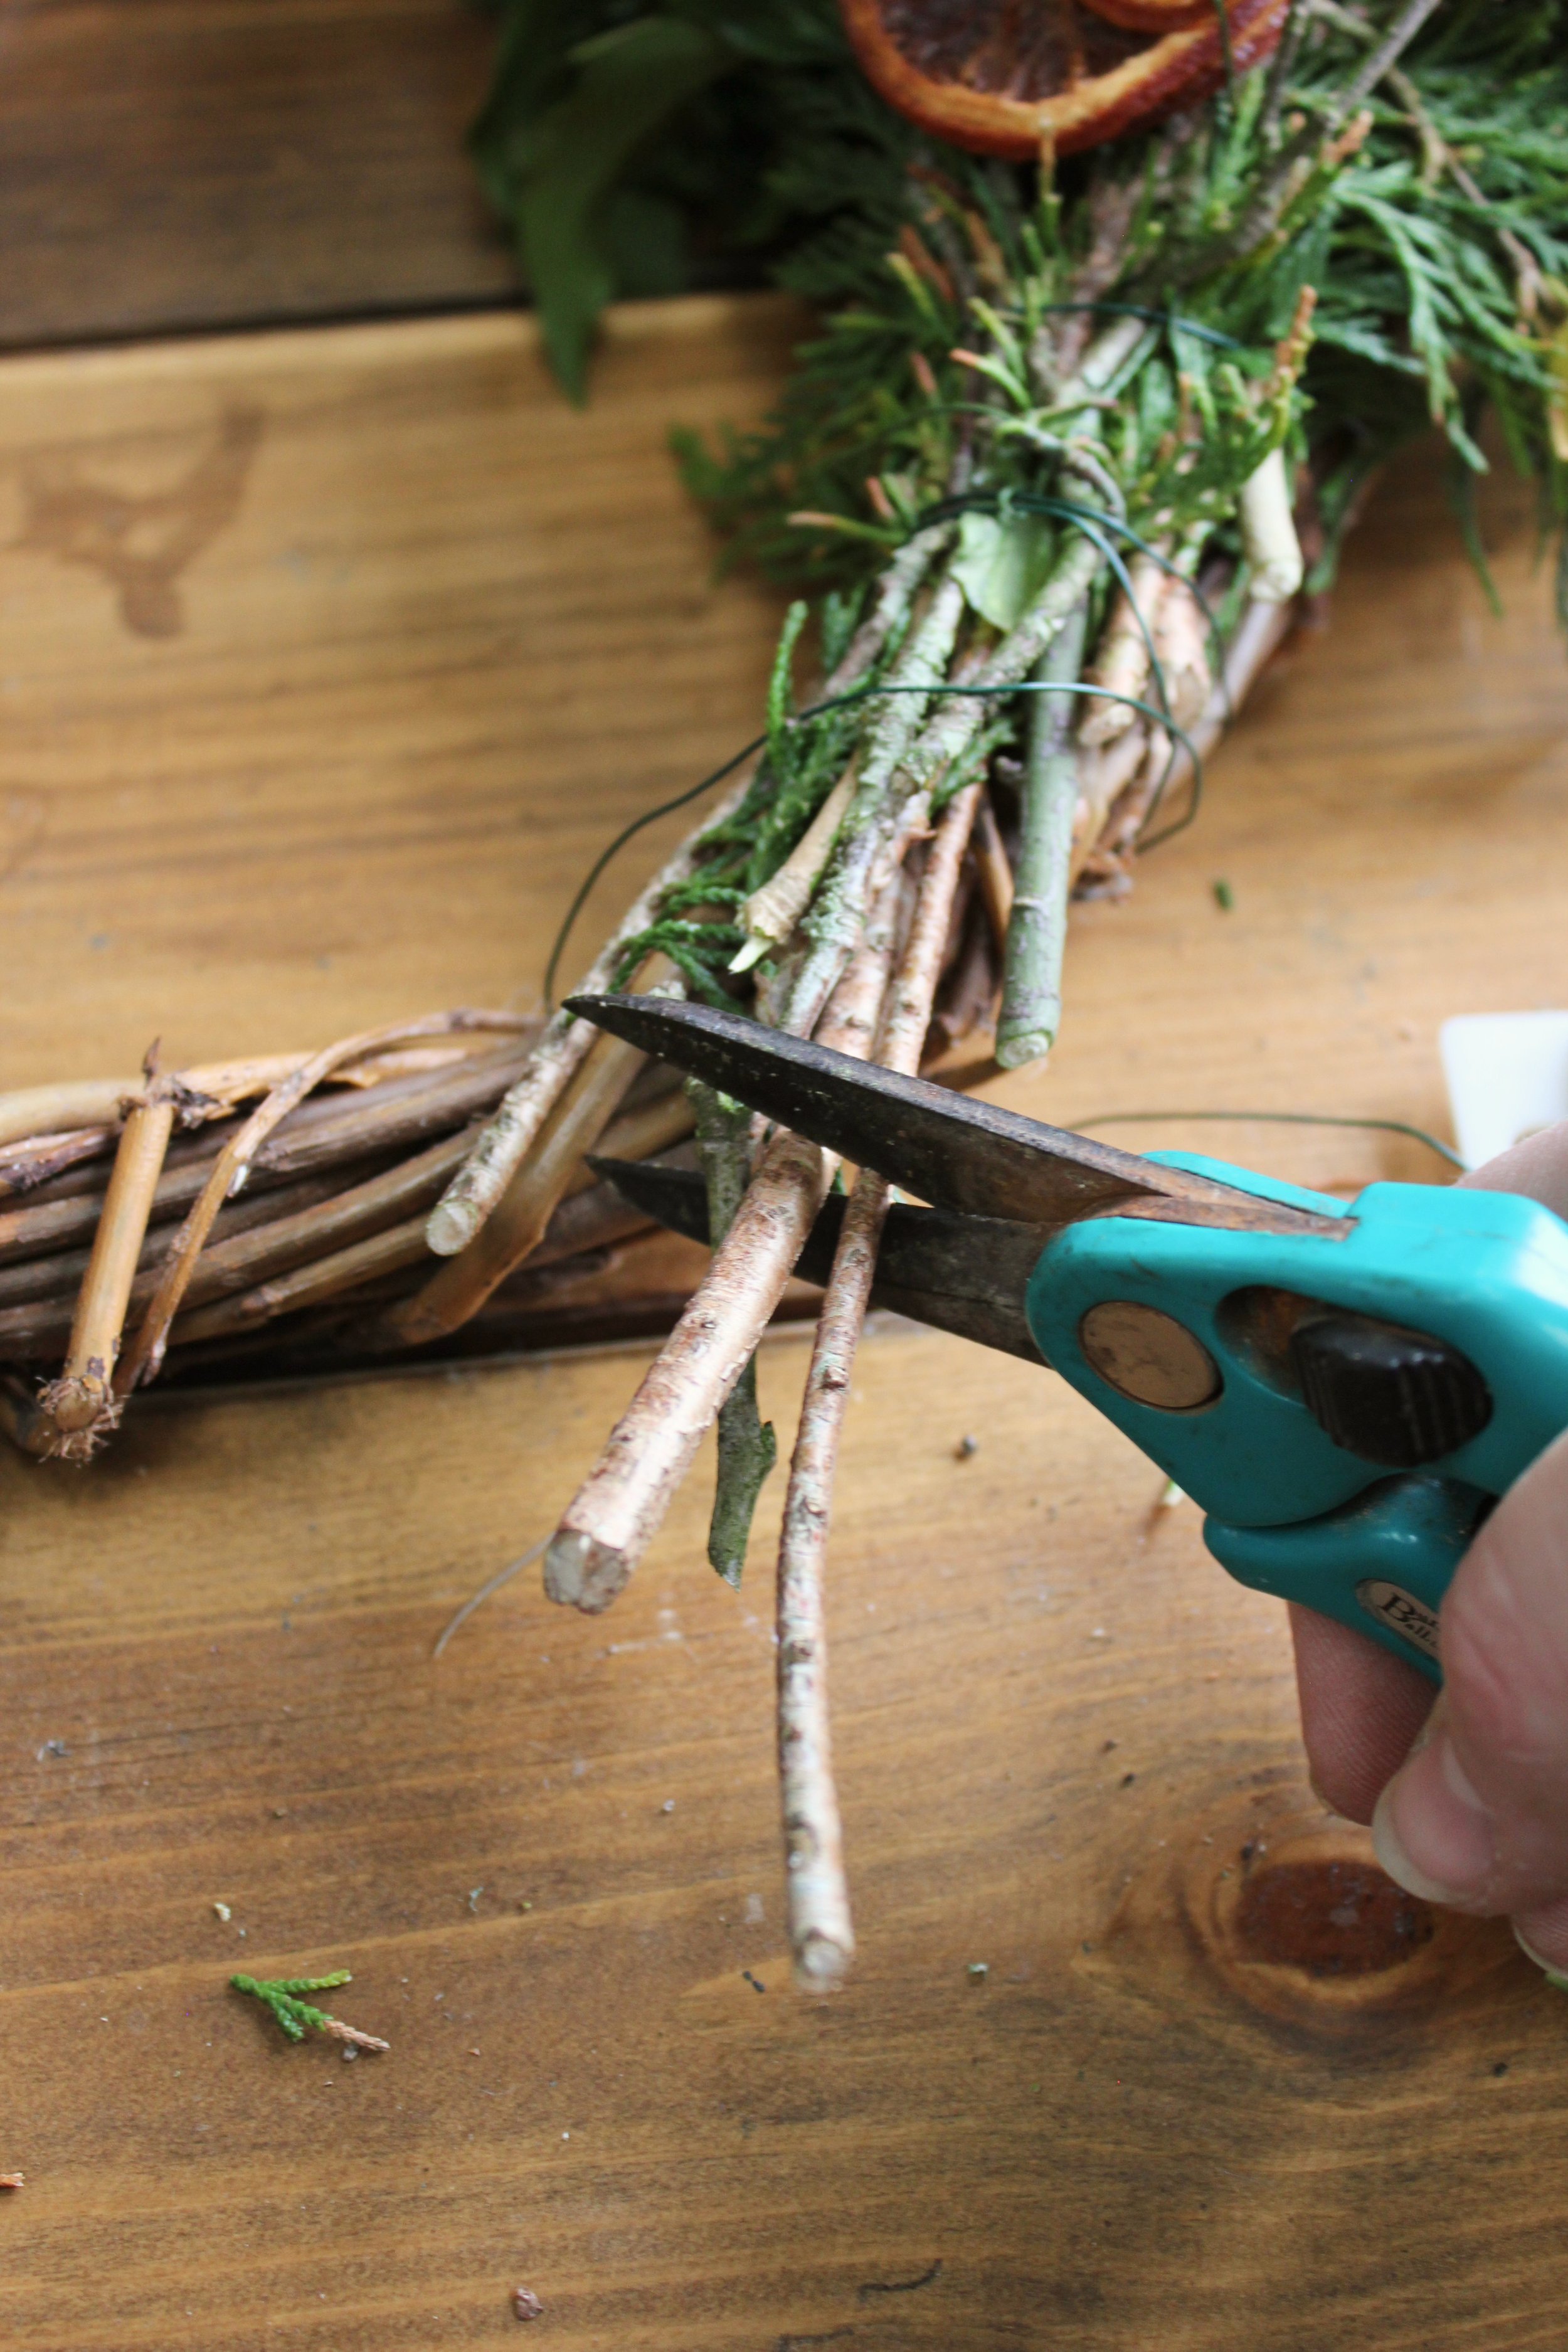
Step 7.
If there are long lengths of stem pointing out of the side of the wreath trim them off with your snips.
Step 8.
Continue creating these bundles, attaching them so that the foliage of the next bundle covers the stems of the previous. You will start to see the wreath coming together as you move round.

Step 9.
When you get to the final section you will have to lift up the foliage of the very first bundle and tuck the very last one in underneath it. It can be a bit fiddly but you can always add extra foliage in afterwards to mask any gaps.

Step 10.
Make sure to step back and take a look at the wreath to see if it looks like it flows in a continuous circle.
Step 11.
If you are happy, turn the wreath over and cut the wire length securing it to the back.
Step 12.
If there are any bare patches you can push in some extra sprigs of foliage. Just make sure they are well secured by pushing them behind the wired down pieces.
Step 13.
To create the loop to hang your wreath with take a length of wire bend it in half and then bend it again. You want the final length to be around 15cm.

Step 14.
Weave it behind some of the stems of the wreath base leaving a loop sticking out the top. Before you do this make sure to see which way up the wreath looks best!

Step 15.
Fold up the bottom sections of the wire and wrap them around the loop several times until it is secure.

Step 16.
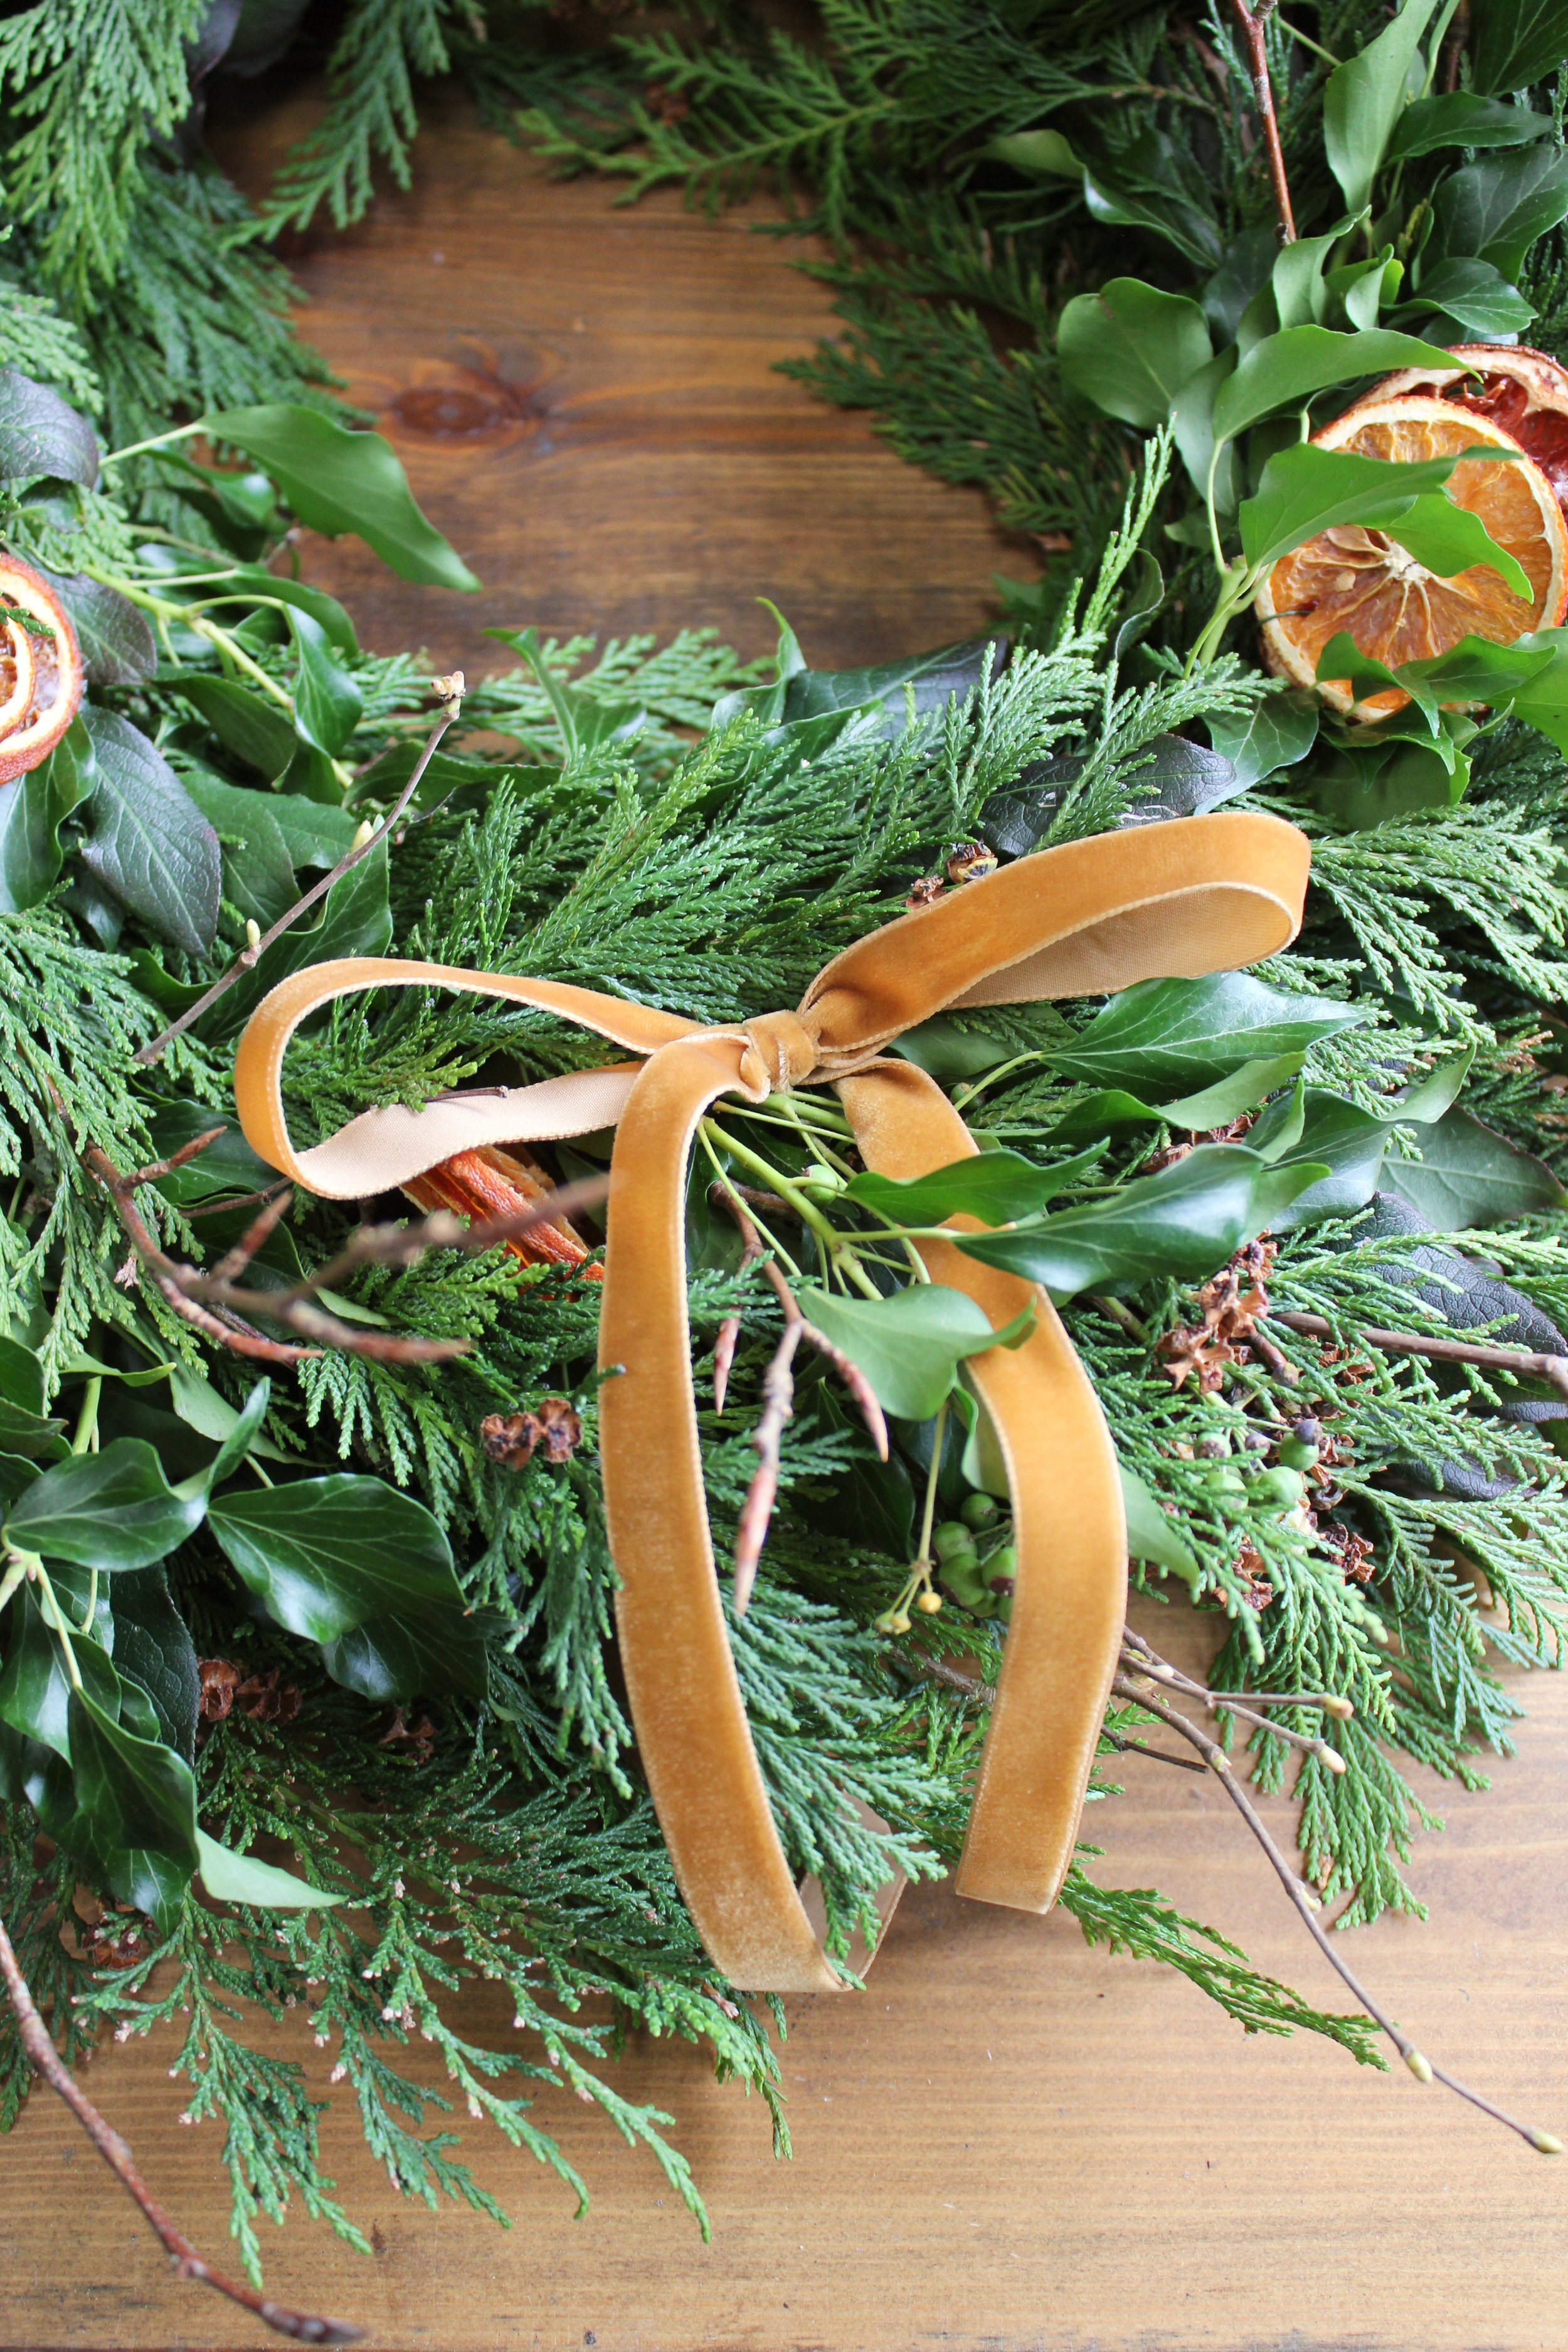
If you want to add a bow to your treat take a length of floristry wire and wrap it around a long section of ribbon. You want the ribbon to be long enough to tie a bow and leave long tail lengths.

Step 17.
Tie a bow around this central section so that the wire is sticking out of the knot.

Step 18.
Thread the wire through the wreath at any point you want and bend it round the back to secure it in place.
Congratulations, you have just made a beautiful foraged wreath! Hang this on your doorway with either a small nail or screw. You can also get suction pad hooks for glass doors.
Happy Making! x